About
Before you train a model, you need to create a Project.
A Project contains images and annotations. This data can then be turned into a dataset version, a snapshot of your data frozen in time. Versions can then be used to train models.
Web App
Create a Project
First, go to the Roboflow dashboard. Then, click "Create New Project":
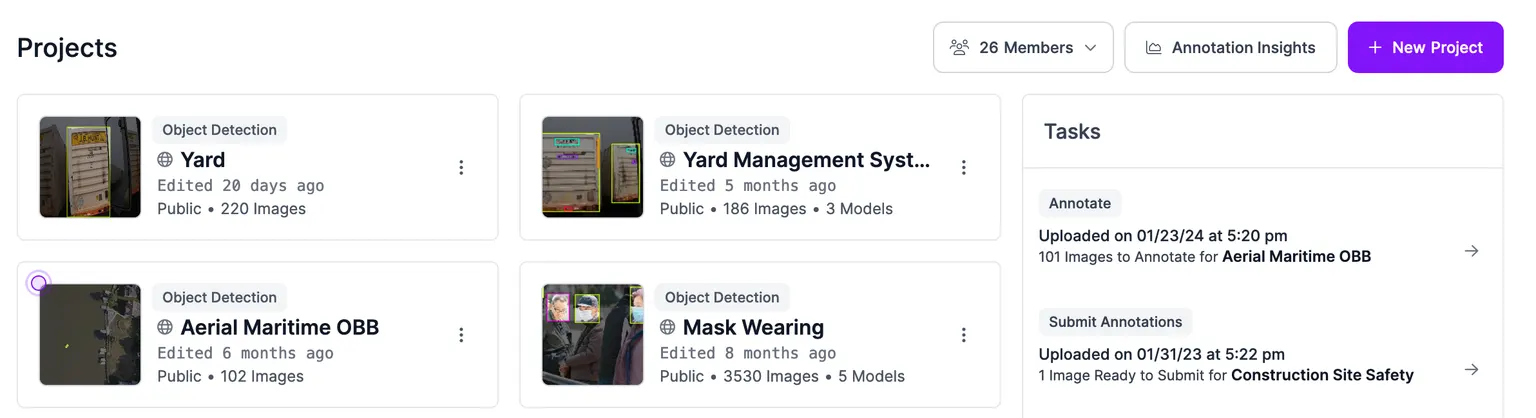
You will be taken to a page where you can create a new project:
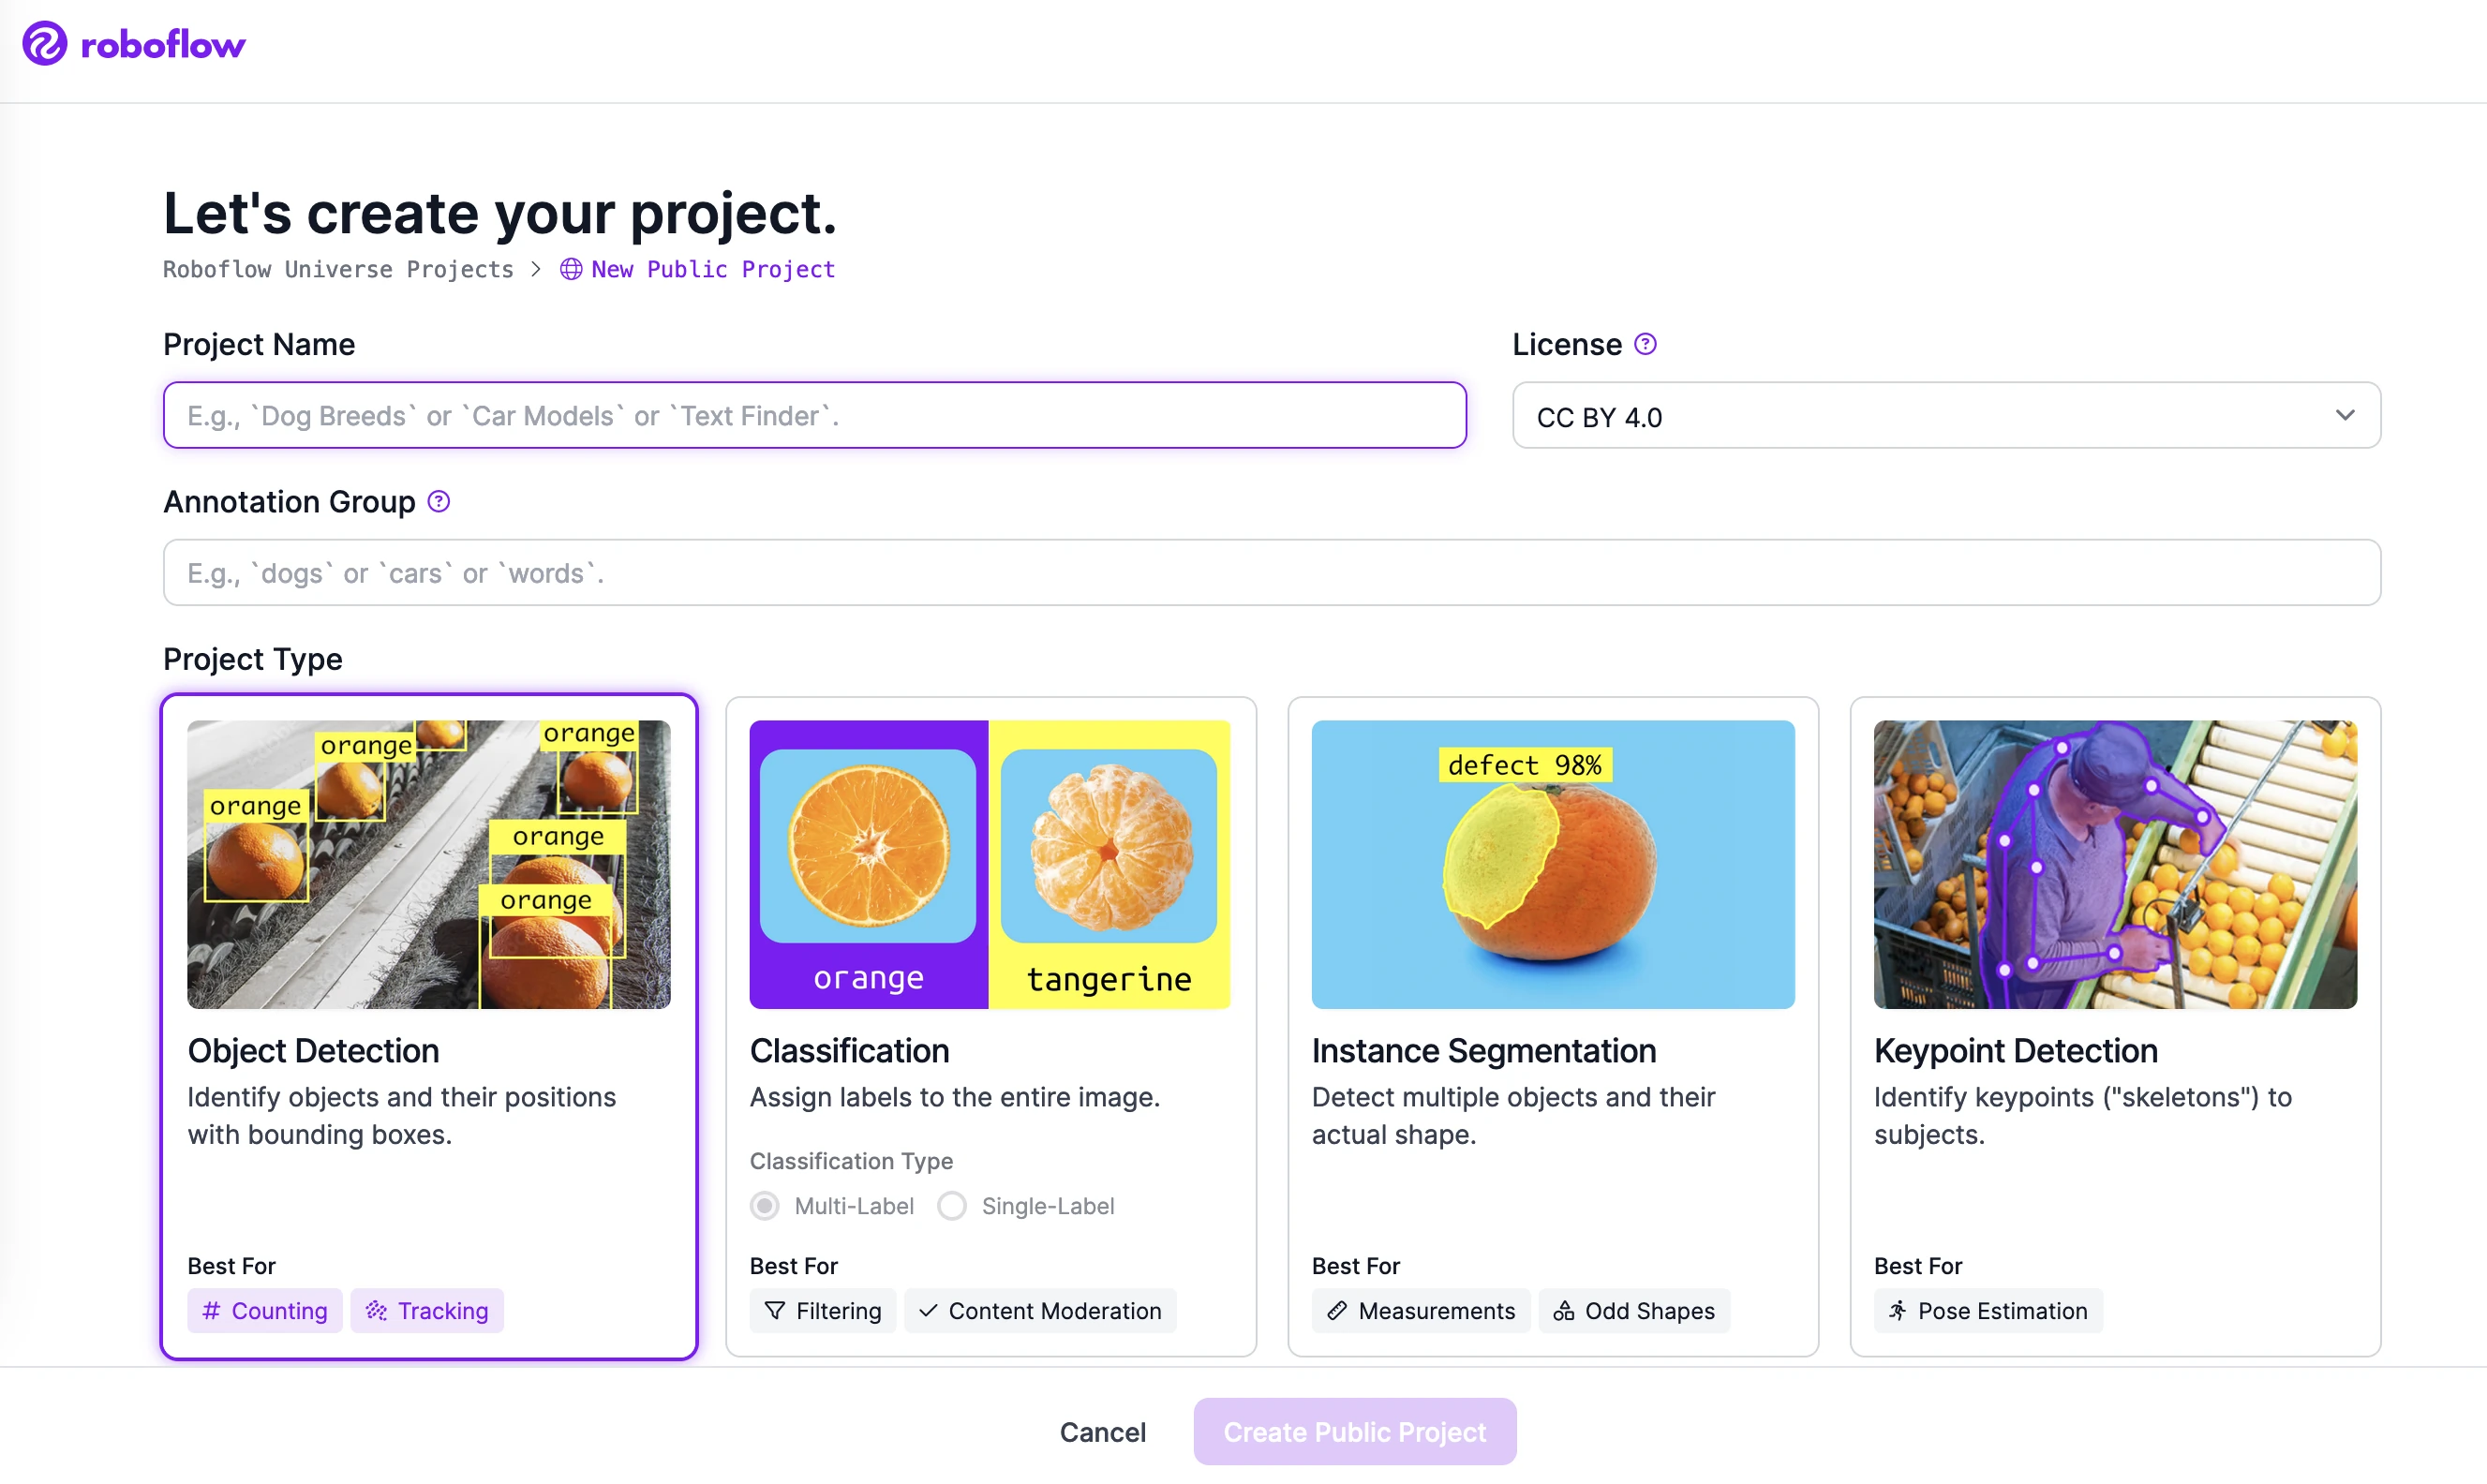
On this page, you will need to fill out:
- A project type.
- Object Detection: Find the location of objects in an image.
- Single-Label Classification: Given a limited set of categories, assign a label to an image.
- Multi-Label Classification: Given a limited set of categories, assign an arbitrary number of labels that are relevant to the image.
- Instance Segmentation: To the pixel level, find the location of objects in an image.
- Semantic Segmentation: To the pixel level, find the location of objects in an image and create unique references for each object found.
- Keypoint Detection: Find the location of objects and their keypoints in an image. Commonly used for determining the pose of an object.
- A project name: The name of your project.
- Annotation group: A label that categorizes what you are detecting in your images (e.g. "chess pieces", "vehicles", "defects"). Projects that share the same annotation group also share their class list and annotations. See Annotation Groups for more details.
When you have specified these values, submit the form to create the project.
If you would like to see another type of project supported you can select the option from the dropdown of project types to indicate your interest.
If you are on a free plan, your datasets and models will be available on Roboflow Universe. If you are on a paid plan, you can create private projects. Private projects are only accessible to your Workspace and are never public.
Create a Project From the Agent
You can create a Project from Roboflow Agent without leaving the chat. Open the "+" tab and click "New model" under "Create". The same form opens inside the tab, with the project type selector and the rest of the fields.
When the Project is created, the tab turns into that Project's view.
HTTP API
POST /:workspace/projects
Create a project in a workspace.
Example Request
curl -X POST "https://api.roboflow.com/my-workspace/projects?api_key=$ROBOFLOW_API_KEY" \
  -H "Content-Type: application/json" \
  -d '{
    "name": "Sharks Dataset",
    "type": "object-detection",
    "annotation": "sharks",
    "license": "MIT"
  }'
Body
| Name | Type | Description | Required |
|---|---|---|---|
name | string | Display name for the project. The URL slug is auto-generated from this. | true |
type | string | Project type. One of object-detection, single-label-classification, multi-label-classification, instance-segmentation, semantic-segmentation, keypoint-detection. | true |
annotation | string | Annotation group - a noun describing what's being labeled (e.g. "sharks", "defects"). | true |
license | string | License for the project. Required for workspaces that aren't already public. Accepted values: Public Domain, MIT, CC BY 4.0, BY-NC-SA 4.0, OBdL v1.0, Private (paid plans only). | false |
group | string | Id of a project folder to place this project in. See Manage Project Folders. | false |
Example Response
{
    "id": "my-workspace/sharks-dataset",
    "type": "object-detection",
    "name": "Sharks Dataset",
    "created": 1688739471567,
    "updated": 1688739471567,
    "images": 0,
    "unannotated": 0,
    "annotation": "sharks",
    "versions": 0,
    "public": false,
    "splits": {},
    "colors": {},
    "classes": {},
    "icon": null
}
Required scope: project:create.
Python SDK
Workspace.create_project() creates a new project in the workspace and returns a Project object you can then upload images to.
import roboflow

rf = roboflow.Roboflow(api_key="YOUR_API_KEY")

project = rf.workspace().create_project(
    project_name="Flower detector",
    project_type="object-detection",
    project_license="MIT",
    annotation="flowers",
)
print(project.id)
Parameters
project_name(str) - the display name. The URL slug is auto-generated from this.project_type(str) - one of:object-detectionsingle-label-classificationmulti-label-classificationinstance-segmentationsemantic-segmentationkeypoint-detection
project_license(str) - set to"Private"for private projects (paid plans only). Public-license values include"MIT","CC BY 4.0","Public Domain", etc. - see the project creation form in the web app for the full list.annotation(str) - the annotation group: a noun describing what's being labeled ("flowers","vehicles","defects"). Used in the labeling UI prompts.
CLI
You can create new projects from the command line.
Command
roboflow project create <name> --type <project-type>Options
| Flag | Description |
|---|---|
--type | Project type (required). See supported types below |
--license | License for the project (optional) |
--annotation | Annotation group name (optional, defaults to project name) |
Supported Project Types
object-detectionsingle-label-classificationmulti-label-classificationinstance-segmentationsemantic-segmentationkeypoint-detection
Examples
Create an object detection project:
roboflow project create my-detector --type object-detectionCreate a classification project:
roboflow project create breed-classifier --type single-label-classificationJSON Output
roboflow project create my-detector --type object-detection --json{
"status": "created",
"project": "my-detector",
"type": "object-detection",
"workspace": "my-workspace"
}MCP Server
Connect your AI agent to the MCP Server and it can create and inspect projects with these tools:
| Tool | Description |
|---|---|
projects_create | Create a new computer vision project. |
projects_get | Get project detail including versions, classes, splits, and trained models. |
projects_list | List projects in the workspace. |
Next steps
- Add images and other data to your project. See Add Data.
- Label your images so they can be used to train a model. See Introduction to Roboflow Annotate.